Showing posts with label healthy. Show all posts

Wednesday, June 9, 2021

Oats Veg Bhakri


Hello Friends, Its been quite a while ( to be precise almost 6 years ) since I have published any post on my blog. I might say that a lot of water has flown under the bridge. My grand-daughter just completed six years now and in the meantime, we have also changed our residence. So, overall it was quite hectic these last few years; but seeing my grand daughter growing up gave me and my spouse enough joy and believe me she is quite a handful! 

Well, I am now trying to get back to blogging  {I hope I have not forgotten how to go about it :) }.  I have now to get in touch with all my blogger friends, and hope to revive their contacts too. Looking forward to  your comments and reply like the good old days.

Frankly speaking, what gave me this sudden impetus to restart my blog is that I participated (having got the info from my husband's nephew) in a recipe contest organised by youthofGSB (Gowd Saraswat Brahmin community to which I belong) and they have published all the recipes in the book named Gowd Saraswat Recipe contest book in a pdf format. I think that's enough of my blabbering.  

As you all know that we are all looking for a healthy breakfast to start our day. I was in a mood to start something new and hence started searching on the net for some oats preparation. After a lot of search, I came across Oats Bhakri. I made some changes to suit the texture & palate. Bhakri is generally spread thickly. You can also refer to my earlier recipe of Red Pumpkin Bhakri


Oats Veg Bhakri served with a dollop of white home made butter


Ingredients:

Oats (Instant)            - 1 cup
Semolina (regular)    - 1/2 cup
Curds                         - 1/4 cup
Green chillies            - 1 or 2 chopped
Water                        - approx 1 cup
Corriander leaves      - a small bunch chopped
Grated carrot             - 2 tbsps
Capsicum (chopped) - 2 tbsps
Tomato (chopped)     - 1 medium
Onion (chopped)       - 2 tbsps
Salt to taste
Oil for shallow frying


Method:

  1.  In a bowl, mix oats, semolina and salt.
  2.  Add curds & mix again.
  3. Next add water to dilute it slightly.
  4. Now add all the chopped vegetables, green chilies and coriander leaves and give it a good mix.
  5. At this stage, add water and mix again without any lumps. The batter should not be very dilute or thick. Let it sit for for about 10 mins.
  6. In the meantime, heat a griddle or tawa . Smear oil
  7. When the pan is hot enough, lower the heat and spread a ladle of the prepared batter not thinly.
  8. Dribble oil all around the bhakri and keep the flame on medium. 
  9. Now flip the bhakri and fry on the other side too.
  10. Continue in the same manner with the remaining batter.
  11. Tastes good with white home made butter.

Preparation Time: 15-20mins
Cooking time       :  20 mins
Makes                   :  8 Bhakris  of  size approx 5-6inches


Ingredients

                                                                   
Oats, Semolina & Salt placed in a bowl
                                               

Curds added to the above mixture
                                                            
Chopped vegetables added to the above mixture
                                       
                                      Batter is mixed thoroughly so that no lumps are formed
                                      
Bhakri has been spread thickly on the hot griddle
                                              

Bhakri has been flipped over


All set & ready to serve
                                                            

Note: 
  • Chop the vegetables as finely as possible.
  • Oats can also be powdered though not much change in the texture of the bhakri.
  • Do not spread the batter thinly.
  • Serve with any chutney of your choice if you do not have white butter.
  • Bhakris have to be eaten hot.


Monday, January 12, 2015

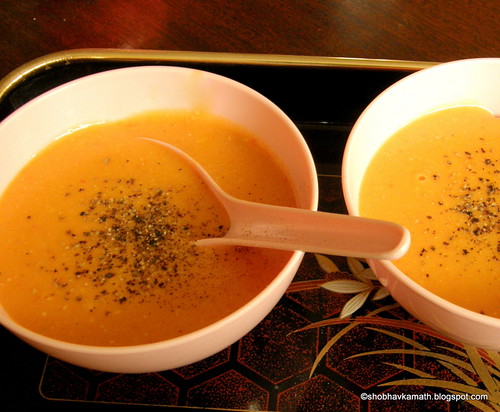
Red Capsicum & Tomato Soup


Let me start by wishing all my friends and fellow bloggers a Very Happy and a Prosperous 2015.
I sincerely hope the New Year will bring glad tidings to you all. I personally don't believe in making any New Year resolutions as they are generally broken. But I thought it might be a good idea to sincerely make an attempt to eat and prepare healthy foods whenever possible. So what better way to start my first post of this year with this hot, nutritious and tasty soup. It's also perfect for the current chilly weather. Me and my spouse thoroughly enjoyed it. 

I shall be taking a short break from blogging and hope to continue with it next month. 


P1080346-001


Ingredients:

Red Capsicum 1
Tomato 2 medium size
Melon seeds 1 tbsp
Garlic (optional) 7-8 pods
Red chilly powder (optional) 1 tsp
Corn flour 1 tbsp
Salt As per taste
Freshly ground pepper For garnish

Method :

  1. Wash red capsicum and tomatoes.
  2. Grind melon seeds to a fine paste using little water and keep aside.
  3. Cut tomatoes in large chunks and boil them in a cup of water. When done set aside to cool.
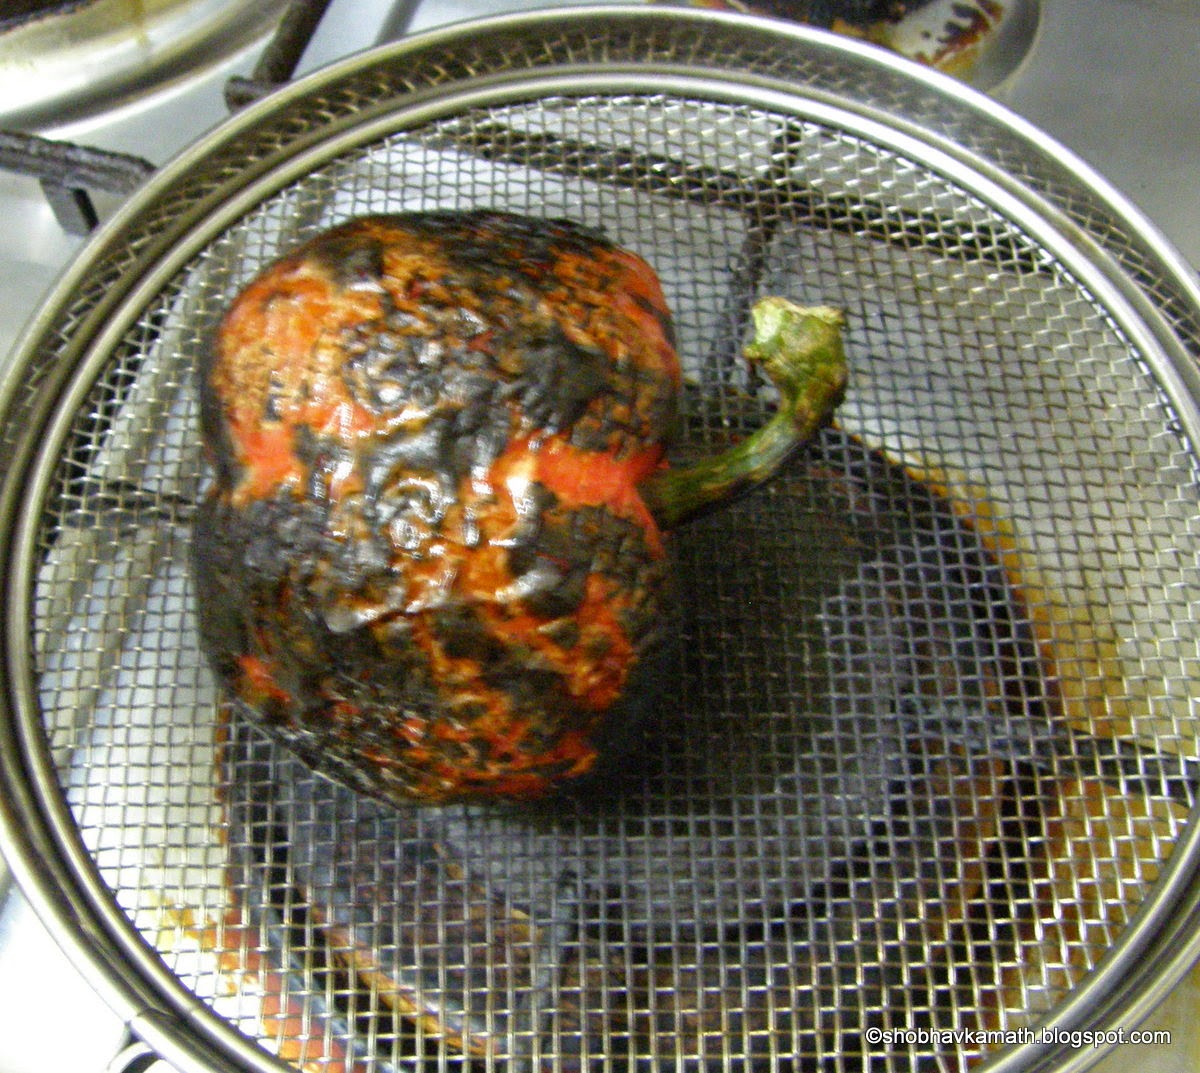
  4. Smear Red capsicum with oil and with the help of a fork roast the capsicum directly on flame. Keep turning the capsicum till the whole capsicum is charred from the outside. Switch off the flame and when cooled, skin the capsicum in a bowl of water. Deseed it and chop it into chunks.
  5. Now grind the cooked tomatoes and the roasted & chopped capsicum along with garlic (if using) to a smooth paste.
  6. In a saucepan, add the ground tomato and capsicum paste, chilly powder and salt. Let it cook on a low flame.
  7. In the meantime, mix the melon seed paste and and corn flour/starch into a bowl and pour the entire contents into the saucepan. Keep stirring it so that no lumps are formed and allow it to boil for a minute or two and then remove from the flame.
  8. Pour the contents in soup bowls. Sprinkle freshly ground pepper on top.

  9. Serve hot.


Preparation time : 15-20 mins
Cooking time : 30 mins
Serves: 3-4 persons

Note:

  • This is a very healthy and tasty soup.
  • Melon seeds have a lot of health benefits and Red Peppers/Capsicum are packed with anti-oxidants.
  • The roasting of Red Pepper takes a little more time than the actual cooking.    

Friday, October 31, 2014

Bajre Ki Cheela


Hello friends, Diwali kept me quite busy before, during and even after the festival and with the result, blogging took a back seat. All said and done, we had a wonderful time. I hope you all had a nice Diwali too.

After all the sweets and savoury items that we devoured, I thought its time to eat healthy stuff and one such item that I came across is the Bajre Ki Cheela. I had jotted down this recipe from a TV cookery show. It seemed easy and healthy so tried it for the evening snack. I am glad to say it turned out quite well. And according to my opinion, it tastes best with a dollop of white home-made butter.

Bajra also known as Pearl millet is loaded with nutrients and has enormous health benefits.


Bajre Ki Cheela - A healthy snack/breakfast dish


Ingredients:

Bajra flour 1 cup
Salt As per taste
Coconut gratings 1 tbsp
Green chilies (chopped) 1
Coriander leaves (chopped) 1 tbsp
Curds 3 Tbsps
Oil For shallow frying


Method:
  1. In a bowl add bajra flour, salt, coconut gratings, green chilies and chopped coriander leaves.
  2. Mix well
  3. Finally add curds and blend in to form a thick batter.
  4. Take a ladle full of the prepared batter and spread it thickly on a heated skillet/ non-stick pan like a dosa - frying on either sides with a little oil on the edges of the dosa.
  5. Remove and serve hot.


Preparation time : 10 mins
Cooking time : 3-4mins for each cheela
Makes : 5-6 cheelas depending upon the size


Note:
  • The batter does not spread thinly so do not even try it. Once the pan/skillet is heated, keep the flame low.
  • Make small dosas the size of Rawa (semolina) Bhakri or a pancake.
  • If your skillet or griddle is large, you can easily make three or four at a time.
  • For more info on Bajra or Pearl millet health benefits, see here :http://recipeclout.india-server.com/pearl-millet.html


Friday, October 10, 2014

Tofu Sandwich Spread


Off late I have started using Tofu instead of Paneer for the simple reason – its a healthier option. Sometime back I had watched Sanjeev Kapoor prepare this Tofu recipe on his cookery show which I had hurriedly scribbled in my dairy for later use.
The day finally arrived for me to prepare this Sandwich spread. I had some left over Tofu (after preparing Tofu Bhurji on the previous day) so thought I will try his recipe. But soon realized that I do not have the two ingredients mentioned in it namely; sun-dried tomatoes and pickled onions. So I substituted these items with tomato sauce and ginger and proceeded with his recipe.

I am happy to say that it turned out really good. It so happened that the next day, I had some close relatives who dropped by and since they are foodies, I asked them to sample it and give their opinion. I was pleased to see that they too enjoyed it.

You too can try your own version of this healthy and tasty spread instead of using the fat laden butter for sandwiches !

Tofu Sandwich Spread


Ingredients:


Tofu 100 gms
Hung Yoghurt 1/2 cup
Green chilies 1-2
Tomato sauce 4 tsps
Ginger (chopped) 1 inch piece
Salt As per taste


Method:

  1. Drain the block of tofu and cut them into quarters. Squeeze out any moisture by pressing it with your hand and then place it in a blender.
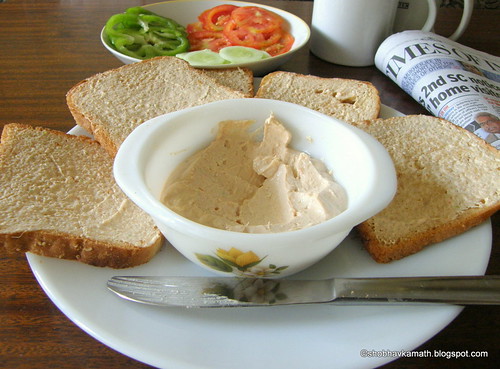
  2. Add all the other ingredients (mentioned above) to it and blend it to a fine paste. The paste will resemble Thousand Island dressing.
  3. Remove it into a bowl and your Tofu Sandwich Spread is ready.
  4. Apply this spread instead of butter on the bread slices and have a healthy breakfast.


Preparation time: 15 mins
No cooking required


Note:

I used whole wheat bread and made sandwiches with sliced tomatoes, cucumber and capsicum and sprinkled freshly ground pepper on top.


Wednesday, July 30, 2014

Makai ki Roti


Makai Ki Roti is a traditional dish from Punjab (India) and normally served with Sarson Ka Saag. The rotis are generally made by hand without the use of the rolling pin. I am not very good at this technique. I have done this before and ended up with shapes resembling that of the map of India and various other countries !

Hence, in this recipe, I have added a bit of wheat flour to the maize flour to make it pliable and easier to handle. I managed to roll them out nicely though the dough needs to be handled with care as it will break at the edges while rolling it out into rotis.
All said and done, it turned out well – tastewise and appearance wise too. I also had the approval of my spouse.  We had a few rotis for lunch today and I am planning to prepare this again for breakfast tomorrow from the leftover dough. 


16-P7300077


Ingredients:

Maize flour 1 cup
Whole wheat flour 1/4th cup
Ajwain (carom) seeds 1 tsp
Jeera (cumin) seeds 1 tsp
Haldi (turmeric) powder 1/4th tsp
Salt 1 tsp OR as per taste
Soda or Eno 1/2 tsp
Curds 1/4th cup
Water 1/4th cup OR as required


Method:
  1. Crush ajwain and jeera seeds together and keep it aside.
  2. In a bowl, add maize flour, whole wheat flour, crushed ajwain and jeera seeds mixture, turmeric powder, salt, soda/eno and curds. Mix it well.
  3. Next add water little at a time and knead it into a soft pliable dough. Keep it covered for about 20 mins.
  4. After 20 minutes, make medium size balls. Dust each ball with maize flour and roll it into moderately thick rotis with the help of a rolling pin.
  5. Then heat a griddle/tawa and place the rolled out roti on it. After a few seconds, flip it on other side and fry it on the other side too. Keep the griddle on a low flame. Do not add oil or ghee while frying.
  6. When light brown spots appear on both the surface, remove and place it on a plate.
  7. In this way, prepare all the rotis.
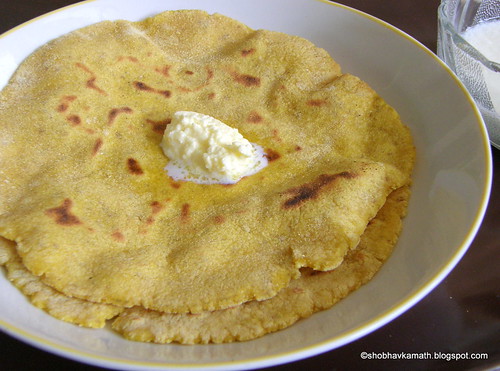
  8. Serve hot with a dollop of home-made white butter or with a bowl of curds.


Preparation time: 20 mins
Cooking time: 30 mins
Makes : 10 rotis of about 6 inches in diameter

Note:

  • This is ideal for breakfast and can also be served during lunch.
  • It tastes excellent with a dollop of home-made butter. But weight-watchers can also relish this with curds.
  • These rotis are a slight twist to the original Makai ki Roti.


Saturday, June 28, 2014

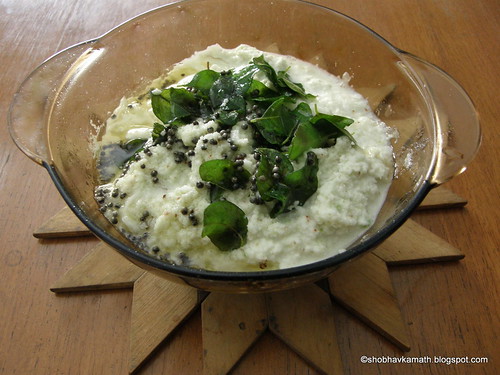
"Magge" Pachadi


Friends, I have been quite preoccupied with some social commitments, relatives visits and water problem with the result, my blogging took a back seat. I had almost become a recluse where facebook was concerned and had no time to surf the net. 

Anyway, here I am. So, what is “Magge”?
“Magge” is the konkani word for “Yellow Cucumber”. I believe, it is also called as “coloured cucumber”. Down south, especially in Mangalore, Udupi and the coastal regions, this vegetable is available in plenty and stored in the houses for use during the monsoons. It stays fresh even without refrigeration for a longer period than other vegetables. 

We Amchis (konkani speaking people) add “magge” in a lot of dishes without peeling the skin. Since pachadi is made without cooking, it needs to be peeled as the skin is slightly tough. 


Magge Pachadi


Ingredients:

Magge (yellow cucumber) 1/4th piece
For Grinding:

Freshly grated coconut 1/2 cup
Green chilly 1 or 2
Salt As per taste
For tempering:

Oil 1-2 tsp
Mustard seeds 1 tsp
Curry leaves 1 sprig


Method:

  1. Wash the Magge (yellow cucumber) and cut 1/4th piece of it.
  2. Peel, discard the seeds and grate it (either manually or in a food processor ) and place it in a bowl.
  3. Grind all the grinding ingredients into a paste adding little water (if needed). Add this ground paste to the grated cucumber and mix well.
  4. Heat oil in the tempering pan. Add mustard seeds and when they splutter, add the curry leaves into it. Remove from flame and pour the entire contents on to the mixture of grated cucumber and coconut paste. Mix well.
  5. Serve this pachadi as a side dish.

"Magge" cut into half
Some of the ingredients
Grated "magge"
Grated coconut & green chilly ground to a paste
Ground paste added to grated "magge"
Tempering under process
Magge Pachadi ready to be served

Preparation time : 15 mins
Cooking time : 3-5 mins
Serves : 2

Note:
  • This pachadi is also a good accompaniment for chapattis/rotis.
  • This is generally prepared during the summer months as it is very cooling.
  • This is a cold dish and is very tasty.