Hello friends, Diwali kept me quite busy before, during and even after the festival and with the result, blogging took a back seat. All said and done, we had a wonderful time. I hope you all had a nice Diwali too.
After all the sweets and savoury items
that we devoured, I thought its time to eat healthy stuff and one such
item that I came across is the Bajre Ki
Cheela. I had jotted down this recipe from a TV cookery show. It
seemed easy and healthy so tried it for the evening snack. I am glad
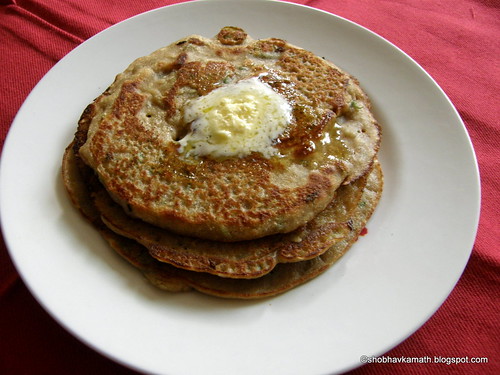
to say it turned out quite well. And
according to my opinion, it tastes best with a dollop of white home-made butter.
Bajra also known as Pearl millet is
loaded with nutrients and has enormous health benefits.
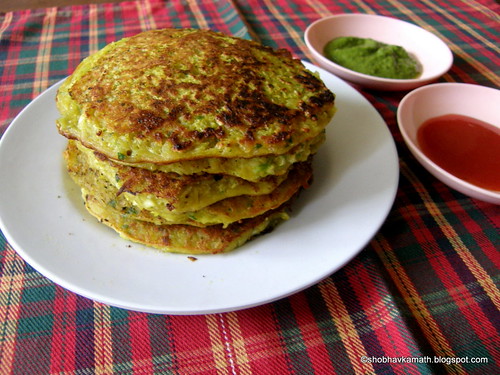
Ingredients:
| Bajra flour | 1 cup |
| Salt | As per taste |
| Coconut gratings | 1 tbsp |
| Green chilies (chopped) | 1 |
| Coriander leaves (chopped) | 1 tbsp |
| Curds | 3 Tbsps |
| Oil | For shallow frying |
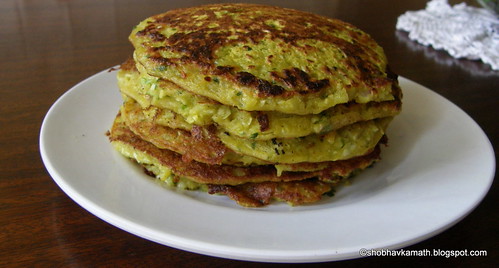
Method:
- In a bowl add bajra flour, salt, coconut gratings, green chilies and chopped coriander leaves.
- Mix well
- Finally add curds and blend in to form a thick batter.
- Take a ladle full of the prepared batter and spread it thickly on a heated skillet/ non-stick pan like a dosa - frying on either sides with a little oil on the edges of the dosa.
- Remove and serve hot.


Preparation time : 10 mins
Cooking time : 3-4mins for each cheela
Makes : 5-6 cheelas depending upon the size
Note:
- The batter does not spread thinly so do not even try it. Once the pan/skillet is heated, keep the flame low.
- Make small dosas the size of Rawa (semolina) Bhakri or a pancake.
- If your skillet or griddle is large, you can easily make three or four at a time.
- For more info on Bajra or Pearl millet health benefits, see here :http://recipeclout.india-server.com/pearl-millet.html