Showing posts with label recipe. Show all posts

Friday, June 29, 2012

Sprouted Moong (Green Gram) Usal (without the green husk)


I am sure you all are aware that sprouted green grams are full of protein and are good to include it in our daily diet.

Initially I used to consider it a pain to sprout the moong thinking that it is a long drawn process. Moreover, the process of separating the husks from the gram appears to be a daunting task. But it is not so. I actually found the process to be quite simple and not cumbersome at all. Of course, it does take more than a day to sprout (especially during cold seasons) and another day to remove the husks. So you will have to plan it accordingly. Or, the easiest way would be to get it from the supermarket! Now, Sprout makers are also available in the supermarket.

Please note, the husks need not be removed at all. You can prepare the “usal” skipping this procedure. Infact, the husks are a good source of fibre.

Frankly speaking, I have no idea why we remove the husks but we (Amchis) do, especially for making “Mooga Ghashi” – maybe for its aesthetics !


 Sprouted green gram Usal 29

Ingredients:

Whole Moong (Green gram)
1 cup
Onion (Chopped)
1 large
Green chillies (chopped or slit)
3-4
Ginger (chopped)
1 inch piece
Garlic (chopped)
6-8 pods
Salt
As per taste
Sugar
1 tsp
Lime
1 (Juice of  1 lime)
Water
About half a cup
Seasoning ingredients:

Oil
1-2 tbsps
Mustard seeds
1 tsp
Asafoetida/Hing
¼ tsp
Curry leaves
1 sprig
For Garnish:

Corriander leaves (chopped)
2 tbsps
Grated fresh coconut (optional)
2 tbsps
Grated carrots (optional)
1 tbsp


How to sprout the Moong/Green Gram

  • Wash and soak the moong/green gram in water overnight and the following morning drain the water completely and cover the vessel with a lid and keep it in a warm place for the moong to sprout.
  • By night of the same day (if it is summer season) the moong will have sprouted (small ones).  If not, keep it covered till it sprouts.
How to remove the green husk from the gram

  • Once it has sprouted, transfer the sprouts to a larger vessel and fill the vessel with water almost up to the brim. Cover it with a lid and keep it overnight.
  • Next morning, almost all the green husk (90% of it) will float on the surface of water.
  • Remove the green husks and drain away all the water and what remains is the white sprouted green gram with a few husks still clinging on to the gram.
  • Now you are ready to prepare the "Usal".


Sprouted green gram Usal 7
Sprouted Green Gram with the husks removed


Method for preparing the usal:

  1. Place a pan/wok on medium fire with the oil in it.
  2. When the oil is heated, season it with the seasoning ingredients (mustard seeds, hing and curry leaves).
  3. When the mustard seeds start spluttering, add in the green chilies, ginger and garlic. Fry for few minutes and then add the chopped onions.
  4. Cook till onions are translucent (soft) but not browned.
  5. Add the sprouted Moong, turmeric, salt and sugar. Add a little water, mix well and cover it and allow it to cook on low flame till the moongs are tender. This should take about 10-15 mins. Switch off the gas.
  6. Squeeze out the juice of one lime and garnish it with freshly grated coconut (optional) and chopped coriander leaves & finally grated carrots (optional) for decoration purpose.

Ingredients
"Usal" getting ready


Serves: 3-4 persons


Note:

  • This is a very tasty "usal" and goes well with phulkas, chapattis or parathas. It also tastes delicious with rice and rasam or dal too.
  • Once the moong has sprouted, it almost doubles in quantity.
  • I have omitted the freshly grated coconut in this recipe.
  • Fenugreek seeds can also be sprouted in the same manner and its "Usli" tastes delicious too.

Friday, June 22, 2012

"Bimbul" Pickle (Bimbla Nonche)


“Bimbul” is a konkani word for this wonderful small, green coloured tangy fruit. In southern parts of India, they are found in the backyards of most homes.
Local people eat this sour fruit, raw with salt and chilly powder. We "Amchis" (konkani speaking people) generally use them in curries in place of tamarind. The other options are to make pickles and “gojjus” and “pacchadi” out of it.

I did some research on the net to find the English and Hindi equivalent names. I found out that its botanical name is Averrhoa Bilimbi and is known as “cucumber tree” or “tree sorrel” in English and “Bilimbi” in Hindi.


I got these home-grown "bimbuls from a friend of mine and the recipe from my neighbour ! It turned out so delicious, that I thought of sharing it.


 BimBul Pickle 14

Ingredients:

Bimbul
15 Nos
Oil
3 tsps
Mustard seeds
1 tsp
Methi (fenugreek) seeds
¾ tsp
Curry leaves
1 sprig
Chilly powder
1-2 tsps
Hing (asafetida) water
1 tsp
Jaggery powder/Sugar
1 tsp
Salt
As per taste


Method:

Bimbuls

  1. Wash the Bimbuls and pat them dry with a kitchen towel.
  2. Cut these Bimbuls into fairly thick (about 3/4 inch) slices and keep aside.
  3. Heat the oil in a non-stick pan. Add to it mustard seeds and methi seeds.
  4. As soon as the mustards seeds start spluttering, lower the heat and add curry leaves and chilly powder. Stir it well and immediately add the cut bimbul slices.
  5. Stir it till the bimbul leaves its water and shows slight discolourtion.
  6. Now add hing/asafetida water, salt and jaggery powder. Give it a good stir. At this point, bimbul slices would have slightly wilted. Switch off the gas.
  7. Allow it to cool and then store it in an air-tight glass bottle and refrigerate it.

Pickle being stir fried
Ingredients kept ready


 Makes: One small bowl


Note:

  • It goes well with curd rice, dal-rice and also with chapattis. It goes well with “pej” (Konkani word for hot rice-congee/kanji).
  • This pickle will last for a month when refrigerated and stored in an air-tight glass container.
  • The amount of chilly powder used is as per one’s taste. I used 11/2 tsp in this recipe.
  • Hing water is hing paste dissolved in water. You may also use Hing powder.
For more info on Bimbul, see here: http://en.wikipedia.org/wiki/Averrhoa_bilimbi

Thursday, June 14, 2012

Mango Lassi


Everybody is familiar with mango milkshake. But “Mango Lassi” ? Well, this is what I tasted recently at a mall and it was so delicious, that I had to make this at home. I love mango and I love lassi – so naturally (according to my opinion), the combination of these two ingredients can only be heavenly!

Any ripened and sweet mango will do. Personally, I would prefer Alphonso mango. However, at the time of making this I had Mallika (a very large, sweet and fleshy variety available locally in Bangalore). The curds too should be preferably sweet not sour.
So, try this out before the mango season ends!


Mango Lassi 12

Ingredients:

Ripe Mango
1
Yoghurt/curds
1 cup
Sugar (optional)
As per taste
Water
As required


Method:

  1. Wash the mango, slice it and remove the pulp. Or peel the mango, discard the seed and cut it into chunks - whichever way you prefer. (Keep a tablespoon of this pulp aside for garnishing – this is optional.)
  2. Place the rest of the pulp in a blender along with the curds and run it for a few minutes till it is well blended. Add a little water to get the desired consistency.
  3. Pour this mixture into glasses and top it with a tsp of the mango pulp kept aside for garnishing.
  4. Serve chilled.

Mango Lassi 14


Makes: 3 Glasses

Note:

  • The addition of sugar and water depends upon once preference.
  • I have added a little water and omitted sugar.
  • If the curd is a little watery, it does not matter – in which case just omit adding water and if the curd is slightly sour, add some sugar.


Thursday, June 7, 2012

Raw Papaya Paratha


Raw Papaya is used in salads, curries or stuffing for parathas – either way it is a great way to eat it as it is very nutritive. This vegetable is used very often in Thai cuisine.

The raw papaya that is shown here, did not have a single seed inside and made my job that much easier. I just had to peel off the skin and grate it. This recipe is from the famous chef Sanjeev Kapoor of Khaana Khazana fame.  It turned out so delicious that I did it a second time and was highly pleased to see it disappear from the serving plates before I could churn out another one!

See here also for the Raw Papaya Salad recipe.

Raw Papaya Paratha 15

Ingredients:
For the stuffing :
Raw Papaya

Raw Papaya (grated)
About 2 cups
Green chilies (chopped)
1 or 2
Red chilly powder
½ tsp
Jeera/Cumin powder
½ tsp
Garam Masala
1 tsp
Amchur (Dry mango) powder
1 tsp
Salt
As per taste
Coriander leaves (chopped)
2tbsps

You will also need the following:
  • Prepared chapatti dough from wheat flour
  • And oil for shallow frying


Method:

  • Prepare the dough with whole wheat flour as you normally do for making chapattis. It should be soft and pliable.
  • Make fairly large sized balls from the dough and keep them aside.

For the Stuffing:

Ingredients
  1. First squeeze out the juice as much as possible from the grated raw papaya and place it in a bowl.
  2. Roughly crush chopped green chilies and salt together and add this in the bowl.
  3. Next add all the powders (red chilly, jeera, garam masala and amchur) and the chopped coriander leaves.
  4. Use your hands and mix them well.
  5. Take each dough ball, flatten them using your hands or the rolling pin and take a small quantity of the above mixture and place in it (as shown in the pic) and seal it well. 
  6. Now using the rolling pin, and dusting the board with wheat flour, lightly roll them into the required size parathas.
  7. In the meantime, heat a tawa or a griddle. Wait till the tawa is hot enough and then lower the flame to "low" and place the prepared paratha on it. After a minute, flip it on the other side.
  8. Dribble a little oil on the edges and fry them on either side till brown spots appear.
  9. Remove and serve hot with plain curds.


Raw Papaya Paratha 8
Grated Raw Papaya mixture being stuffed in the paratha base

Note:
    • The above stuffing is enough for 3 medium size parathas.
    • A dollop of home made butter (white butter) placed on this hot paratha tastes excellent. Watch out for the extra calories though. 

Paratha being fried on one side

Paratha almost ready


Thursday, May 31, 2012

Cholar Dal


This tasty Dal from Bengal is from my recipe collection. “Cholar” is a Bengali word for Channa (in Hindi) and its English equivalent is Bengal Gram or yellow lentil. 
Apart from being tasty, it is also very easy to prepare.  

 Chollar Dal 6


Ingredients:

Channa Dal
1 cup
Oil
1 tbsps
Cumin/jeera seeds
2 tsps
Bay leaf/Tejpatta
2
Chopped green chilies
1 or 2
Grated ginger
1-2 tsps
Grated coconut
¼ cup
Turmeric powder
½ tsp
Asafoetida /Hing
A pinch
Salt
As per taste
Sugar
2 tsps


Method:

  1. Wash the chana dal and boil it in 3 cups of water for about 25 mins or till done. Or you can pressure cook it for about 12-15 mins.  It should not be mushy. Keep it aside.
  2. Heat oil in a pan and to this add jeera, tejpatta, chopped green chilies, grated ginger, grated coconut, turmeric powder, and asafetida and fry for a few minutes till you get a nice aroma. Lower the flame.
  3. Pour the boiled channa dal in the pan. Add a little water if necessary. Do not make it very watery.
  4. Add the required salt and sugar.
  5. Simmer it for a few minutes and serve hot.

Chollar Dal 4
Ingredients for "Cholar Dal"


Serves: 3


Note:

  • This tastes good with rice and chapattis too.
  • I garnished it with chopped coriander leaves. This is optional.

Thursday, May 17, 2012

Veg Makhani (no onion, no garlic)


This famous and delicious cuisine from Punjab needs no introduction. However, this Veg Makhani is slightly different from the traditional one that you may have eaten.

I have converted this dish into a “Sattvic” food, meaning onion and garlic have not been used in preparing this item ; and the taste has not been compromised either.
The list of ingredients used may look daunting but these are available in most Indian kitchens. 

This goes well with jeera rice, chapattis, rotis or kulchas.

 Veg Makhani
Veg Makhani garnished with a green chilly and coriander leaves


Ingredients:

Mixed vegetables
2cups
Tomato
1 large
Tomato puree
½ cup
Melon seeds
2 tbsps
Cardamom (black & green)
1 each
Bay leaves
1-2
Cinnamon stick
1 inch
Cloves
4-5
Star Anise
1
Kasuri methi
1-2 tbsps
Jeera/Cumin powder
½ tsp
Turmeric
½ tsp
Red chilly powder
½ -1 tsp as per taste
Garam masala powder
1 tsp
Fresh cream
2 tbsps
Salt
As per taste
Oil/Butter
4tsps oil/1tbsp butter
Coriander leaves
For garnishing


Method:

Melon seeds
  1. Wash, clean and cut all the vegetables into medium size pieces. Boil the vegetables (except tomato) in a pan containing small quantity of water and taking care that those that need longer time to cook should be added first so that all the vegetables are cooked to perfection and also retain their colour. Once cooked, add salt and keep it aside.
  2. Grind melon seeds with little water to a smooth paste and keep aside.
  3. Blanch tomatoes in hot water, remove the skin and chop them roughly and keep aside.
  4. Heat another pan on medium flame and add, oil or butter (or both). To this add the blanched tomato pieces. Saute it for a few minutes.
  5. Now add the cardamoms, bay leaves, cinnamon stick, cloves, star anise, turmeric powder and chilly powder. Give it a good stir.
  6. Next add tomato puree, jeera powder, garam masala powder and bring it to a boil.
  7. Lower the heat and add melon seed paste, fresh cream and finally the boiled vegetables and simmer for five minutes.
  8. Garnish with coriander leaves and serve hot.

 Veg Makhani 3
Mixed vegetables - washed, cleaned and cut

Veg Makhani 6
Veg Makhani - nearly done

Serves : 4


Note:

  • For mixed vegetables, I used fresh cauliflower, potato, carrot, capsicum and frozen green peas. You can use any vegetables of your choice.
  • I have used melon seed paste instead of cashew nut paste though both give the same texture but melon seeds are a healthier option to cashew nut. You can use either one.
  • Melon seeds (Kharbuza seeds) are easily available in supermarkets. I buy them from Nilgiris.
  • Generally butter is liberally used in this dish; hence the name "Makhani".  I have used a mixture of butter and oil. You can either use oil or butter or a mixture of both.

Tuesday, May 8, 2012

Wheat Kulcha


First of all I wish to thank Ms. Vidya Nayak Shenoy and  Ms. Preethi Mukesh Rao (my facebook friends) for this wonderful “Wheat Kulcha” recipe. The kulchas turned out very soft and tasty.

Some of you may ask – “What is Kulcha ?  ”Kulcha is a type of Indian flat bread and is a cuisine from Punjab. It is generally made from “maida” (all purpose flour) and baked in an earthen clay oven (tandoor) until golden brown.

Since we all do not have a (tandoor) at home, the method and the ingredients have been slightly tweaked to get the same (more or less) texture. Wheat flour (a healthier option) has been substituted for maida.  And instead of the tandoor, our regular tawa has been used.

I made slight changes in the method of preparing the kulchas from the original recipe. I rolled them into small rotis and fried them like “phulkas”. This way, I could work faster and with ease and they all puffed up nicely. Adding of sesame seeds is optional. Infact, in few rotis, I simply omitted sprinkling of sesame seeds while placing it on the tawa; instead I sprinkled lightly roasted sesame seeds on top of the kulcha after applying ghee! 
But the end result was good. 


Wheat Kulcha 30 


Ingredients:

Wheat flour
2 cups
Curds
½ cup
Baking soda
1 tsp
Minced Garlic (optional)
2 tsps
Chopped coriander leaves
1 tbsp
Oil
1 tsp
Water
About 100 -150 ml
Salt
As per taste
For Garnishing

White sesame seeds (optional)
About 1-2 tbsps


Method:

  1. Mix all the above ingredients except water and sesame seeds in a mixing bowl and then add required quantity of water to make soft pliable dough. If you have a food processor this can be done in a jiffy.
  2. Keep the dough covered for at least an hour.
  3. Divide the dough into equal sized balls. Roll each ball into a shape of a thick roti.
  4. Spray (very little) water on the surface of the roti and sprinkle white sesameseeds on it. (This is optional.)
  5. Then place the roti on a hot tawa or griddle with the sesame seed side facing you. After a few seconds, you will notice bubbles on the surface. Immediately overturn the roti with the help of tongs. Keep it for a second.
  6. Then with the help of tongs, remove the roti from the tawa with your right hand and the tawa from the flame with your left hand and place the roti directly on the high flame. The roti will instantly fluff up as shown in the picture. Kulcha is now ready.
  7. Apply ghee (optional) on the surface of the kulcha while hot. Follow this procedure for the remaining balls.
  8. Serve hot.
 Wheat Kulcha 3
Ingredients - for the Kulcha

Wheat Kulcha 4
Kulcha dough prepared in a food-processor

Wheat Kulcha 7
Kulcha dough ready and  placed in a container 


Wheat Kulcha 25
Kulcha being fried on a tawa/griddle

Wheat Kulcha 36
A puffed Kulcha 


Makes : 12  kulchas (depending upon the size of each ball)

Note:
    
·         If you are not making the kulchas immediately, the dough can be kept in the refrigerator; but make sure that when you make the kulchas the next day, do not thaw the dough to room temperature. The kulchas may not puff-up as it leaves moisture.
·         Kulchas are generally served with “Chole”. It tastes good with any dish with gravy.

Tuesday, April 24, 2012

Lollipops


These Lollipops are not the sweet variety. It has been named thus as it is held on a stick.

Mothers are kept busy during children’s vacation. They not only have to think of ways to keep the kids fruitfully occupied but also see that they are fed healthy snacks at regular intervals.

I am sure, every Mom will be happy to serve these lollipops to their kids as they are not only appealing, but also easy to prepare, tasty and healthy too! This snack is generally a great hit at children’s parties.


Lollipops 11
Lollipops with tomato ketchup and coriander-mint chutney

Ingredients:

Boiled whole Black Channa (Gram)
¾ cup
Boiled potato
1 medium
Bread slices (cut into pieces)
2
Chilly powder
½ tsp
Turmeric powder
½ tsp
Amchur
¼ tsp
Garam Masala
¾ tsp
Tomato ketchup
1-2 tsp
Salt
As per taste
Oil
For shallow frying
Wooden ice-cream sticks
12


Method:

  1. Grind the boiled black gram to a paste without adding water.
  2. Mash the boiled potato. Add a tsp of water over the bread pieces and crush it into a paste.
  3. In a mixing bowl, add the ground black gram paste, mashed potato and the bread mash.
  4. To this mixture, add chilly powder, turmeric powder, amchur powder, garam masala, tomato ketchup and salt. Mix well.
  5. Now take a small quantity of this mixture and shape them into tiny lemon size balls. Insert the wooden ice-cream sticks into it and press lightly so that it stays firmly on the stick. Repeat this procedure for the remaining mixture.
  6. Heat a non-stick tawa or a griddle. Smear a little oil on the tawa and place the prepared lollipops on the griddle and fry it (on a medium to low flame) on both sides till they turn golden brown.
  7. Remove and serve hot with either tomato ketchup or green chutney or both.

Lollipops 1
Boiled chana (gram), boiled potato and bread pieces

Lollipops 4
 Mixture (made from boiled chana, potato and bread ) with ice-cream sticks

Lollipops 5
Lollipops ready for shallow frying

Lollipops 8
Lollipops being fried on tawa / griddle


Preparation time: 15 mins
Cooking time    :  30 mins

Makes: 12 Lollipops


Note:
  • The mixture should not be watery; as it will not stay on the stick.
  • Wash the wooden ice-cream sticks in water before applying the mixture to prevent them from burning while shallow frying.
  • If you run out of ice-cream sticks, you can fry them as cutlets/pattice.
  • I used brown bread in the recipe. You may use any bread of your choice.
  • Ice-cream sticks can be bought from super-markets.

Saturday, April 7, 2012

Kalan (without coconut)


Kalan is a Kerala cuisine using Raw Bananas. The original recipe requires coconut. However, in this recipe coconut has been omitted and fairly sour curd is used instead. This one is from my collection. The end result is quite tasty without the hassles of scraping/grating and grinding the coconut !


 Kalan (Raw Banana curry )


Ingredients:

Raw Banana
1
Green chilies (slit)
2
Chilly powder
¼ tsp
Turmeric powder
¼ tsp
Curry leaves
1 sprig
Curd (fairly sour)
1 cup
Salt, asafetida & sugar
As per taste
Seasoning Ingredients:

Oil
2 tsps
Mustard seeds
½ tsp
Fenugreek seeds
½ tsp
Dry red chilies
1-2


Method:

  1. Wash & skin the bananas and cut it into cubes.
  2. In a pan, add a small quantity of water and cook the banana pieces (on medium flame) along with slit green chilies, chilly powder, turmeric powder and curry leaves.
  3. In the meantime, beat curd lightly to break lumps and add salt, asafetida and sugar.
  4. When the bananas are cooked, lower the flame to minimum and add the prepared curd, stirring all the time to avoid curdling.
  5. Prepare the seasoning by frying mustard seeds, fenugreek seeds and dry red chilies. As soon as the mustard seeds start spluttering, switch of the gas and pour the seasoning into the curry. Remove from fire. Stir well.
  6. Serve hot.

 Raw Banana curry 5
Raw Banana - cut into pieces

 Raw Banana curry 6
Raw bananas being cooked in water with other ingredients

 Raw Banana curry 9
Curry ready for the seasoning


Serves: 2


Note:

  • This dish goes well with chapattis or rice and dal.
  • The gravy should not be watery.
  • Do not throw away the banana peels/skin. You can prepare yet another tasty dish from it. See here for the recipe.

Thursday, March 22, 2012

Beetroot Halwa

 
“Yugadi” or "Ugadi" is round the corner. So, here’s wishing you all – readers/viewers, friends and family members, A Very Happy and Prosperous “Yugadi”.

This is my first attempt at making beetroot halwa and that too not by choice but by chance !
Actually, I wanted to make carrot halwa but soon found out that I did not have enough of them. Instead I had beetroots. So that’s how I landed up making Beetroot Halwa using the same method and ingredients that I normally use for making Carrot Halwa. But the end result was fantastic!

It tastes good either hot or cold.

 Beetroot Halwa 13
Beetroot Halwa garnished with Almond pieces

Beetroot Halwa 4
Beetroot Halwa served with vanilla ice-cream

If serving cold, form the halwa into any shape you desire and serve it with ice-cream. I used vanilla ice cream. Try it out and see for yourself.


Ingredients:

Beetroots
250 gms
Milk
1 cup (125ml)
Sugar
¾ cup
Ghee
2 tbsps
Almonds
7-8
Cardamom powder
½ tsp


Method:

  1. Wash, skin and grate the beetroots and keep aside.
  2. Soak the almonds in hot water for about 10-15 mins. Then, peel off the skin and cut the almonds lengthwise and keep aside.
  3. In a non-stick kadai/wok, add milk, grated beetroot and almonds pieces (keep a few for garnishing) and boil it on medium flame till the beetroots are cooked.
  4. Then add sugar and on a medium flame, stir continuously till the mixture becomes semi-solid.
  5. Next add ghee and stir as before till the halwa leaves the sides of the vessel.
  6. Add cardamom powder, mix well and remove from flame.
  7. Garnish with almond pieces.
  8. Serve hot or cold.

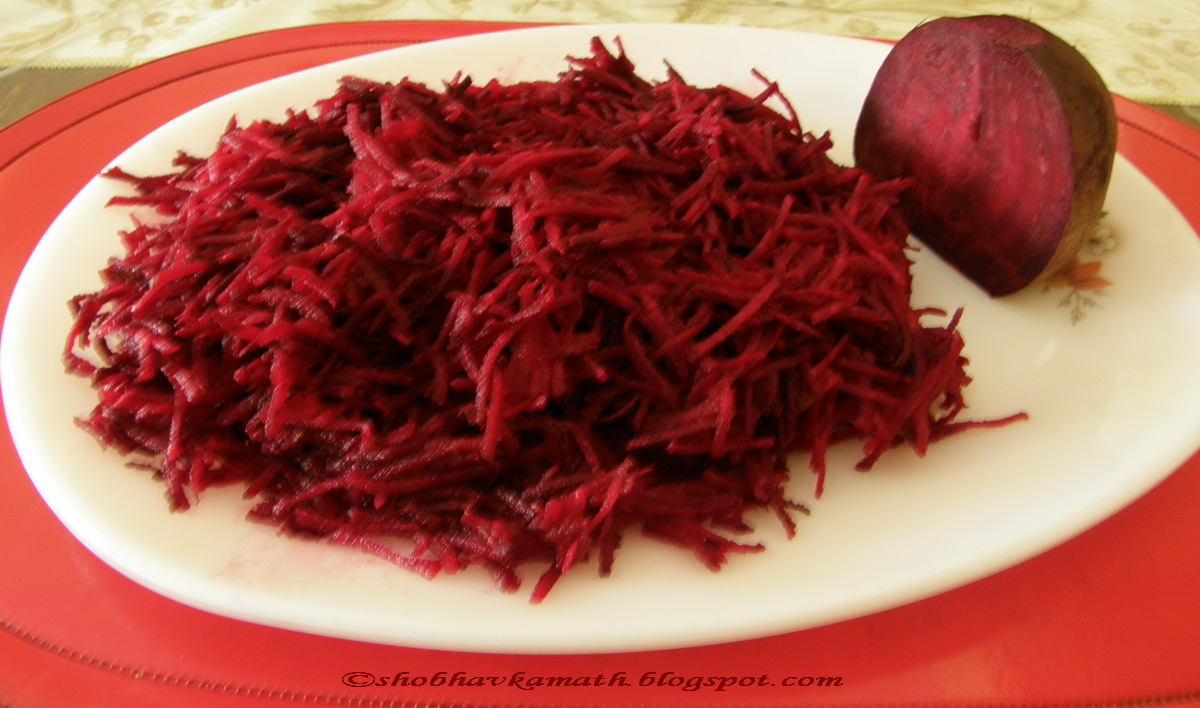
    Beetroot - grated
    Halwa - almost ready


    Preparation time : 15 mins
    Cooking time       : 30 mins
    Serves: 3


    Note:
    • For garnishing, you may use any dry-fruits (cashews, pistachios or raisins) of your choice.
    • Halwa will last for more days when stored in an air-tight container and refrigerated.