Showing posts with label dessert. Show all posts

Sunday, August 10, 2014

Elaneer Payasam


“Elaneer” means tender coconut in the kannada language.
I tasted this payasam a few months ago at a well-known restaurant in Bangalore. It tasted absolutely divine. The taste still lingers in my mouth! Eversince I tasted this, I wanted to prepare this at home but somehow it never materialized. They say that there is time for everything and when the time comes it just happens !

Well, the time finally came and after going through a lot of recipes, I prepared this with some variations – I did not have condensed milk and I was not very keen on buying one. Instead, I boiled half a cup of milk with 3tsps of sugar and reduced it to half the quantity and used this. The payasam tasted just the way I wanted it to be – heavenly ! And, you will have to take my word for it. Try it out and see it for yourself.

While buying tender coconut, ask the vendor to select one with water and some pulp i.e. “ganji” (in kannada), and “malai” (in hindi). The pulp should not be very thick.
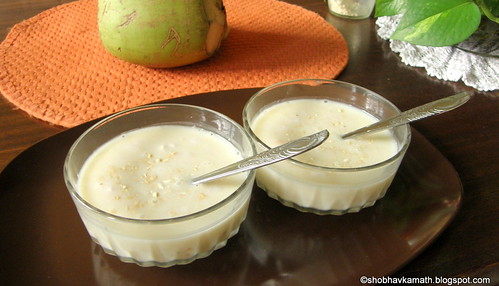
Elaneer Payasam


Ingredients:

Tender coconut water About 1 cup
Tender coconut pulp 1/4th cup
Condensed milk 1-2 tbsps or as per taste
Thick coconut milk 1/4th cup
Cardamom powder About 1 tsp
Cashew nuts (coarsely powdered)        For garnish (optional)

Method:

  1. Pour out the tender coconut water into a glass.
  2. Remove the pulp and keep aside a small quantity and the rest grind to a paste.
  3. Now chop the small quantity of the pulp that is kept aside. This is to be added later to the payasam.
  4. Mix the ground paste and the coconut water into a bowl.
  5. Add the condensed milk, coconut milk and the cardamom powder. Mix well and keep it in the refrigerator for an hour or so. The payasam is now ready to be served.
    Serving Suggestion:
  6. While serving, first place some pieces of the chopped pulp in the bowls.
  7. Then pour the payasam in the bowls and garnish it with coarsely powdered cashews.
  8. Serve chilled.


Preparation time: 15 mins
Cooking time: 15 mins . No cooking required if using condensed milk
Serves: 3-4 persons

Note:
  • You can omit garnishing altogether Or use a combination of cashews, almonds and pistachios Or any one of these nuts. The choice is yours. I have used only cashews.
  • The payasam should be slightly watery and not thick.
  • Grind the pulp for just a few seconds.

Friday, March 28, 2014

Fruit Matto


Well friends, its more than two weeks since my last post wherein I had promised to try out the recipes I learned at the cookery demo.

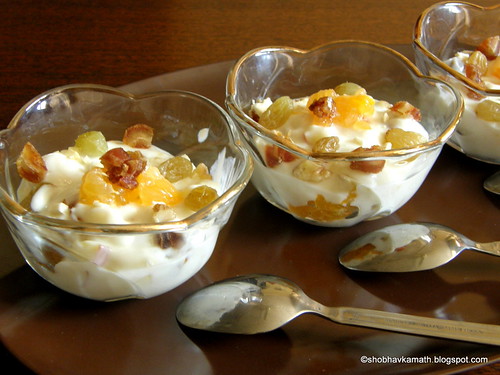
I tried this Fruit Matto and I am glad to say that it was well received by my family members. The name has a “gujarati” touch to it. “Matto” or “Matta” in gujarati language means curds. So in short, this is a quick dessert made with fruits and curds. It is easy to prepare, healthy, tasty and a very refershing dessert for the summer season.

I also added dry fruits (walnuts, cashews, dates and raisins) to make it healthier and tastier. During the demo, she had used fruits such as grapes, bananas and pomogranate. I had bananas (small ones – elakki bananas), apples and oranges so, used these instead.

As for the curds I used the thick curds that is available in the super market. It saved me the trouble of hanging the curds in a muslin cloth for three hours!

9-P3210104


Ingredients:

Hung curds/Thick curds 400 gms
Powdered Sugar 1/3 cup or as per taste
Fresh mixed fruits (chopped) 1 - 3/4 cup
Mixed Dry fruits (chopped) 1/4 cup

Method:

  1. Place the thick/hung curds in a bowl.
  2. Add powdered sugar to it and mix well till the sugar is completely dissolved and the mixture is smooth.
  3. Add chopped mixed fruits and mix again and finally add the chopped dry fruits keeping aside a few pieces of the mixed fruits and dry fruits for garnishing before serving.
  4. Serve chilled.
Thick curds and sugar
Curds and powdered sugar mixed into a smooth paste
Fruits - being chopped
Dry fruits - chopped 

Chopped fruits (except oranges) and dry fruits added to the mixture
Lastly added orange pieces and raisins as garnish

Preparation time : 30 mins.
No cooking required
Serves : 3-4

Note:
  • I had thick curds in my refrigerator and used it to prepare this. In case you do not have thick curds at hand, then use the regular curd by putting it in a muslin cloth and hang it for about 3 hours till most of the water is drained out. Take care to see that it should not be so thick that it is devoid of any moisture.
  • While mixing fruits, take care to use only those fruits that do not leave its juices like oranges, sweet lime, water melon etc. In case, you have no option ( as in my case) then add these fruit pieces just before serving so that the dessert does not become watery.
  • I used a little less than half a cup of powdered sugar. You may use a little more as per your taste.
  • I also used raisins which I added towards the end.
  • If fruits such as apples and bananas are used then, squeeze a little lime juice over the cut fruits ( to avoid discolouration) and then add them into the mixture.

Sunday, April 15, 2012

Ripe Banana Gojju (sweet, sour and spicy)


Summer is here! As you all know that during this period, fruits and vegetables if not preserved properly will ripen fast and rot easily. It’s a shame to waste food under any circumstances.

Among the fruits, bananas ripen very fast. And since they are generally not preserved in the refrigerator, the best thing to do is to consume them fast or else they will over-ripe and when that happens, the peels of the banana turn black and the sight of which prevents you from eating it. But now there is a solution! You can prepare this tasty "gojju" from the over-ripened ones too!

This “gojju” is a very common dish among our GSB (Konkani speaking) community. However, there are different variations to it.  I learnt this version from my Mom.

This is served as a side dish. It also tastes good when eaten with phulkas or chapattis. The sweet, sour and spicy combo makes it very appealing. I remember one of my nephews (during his childhood days) who was so fond of this dish that he would allow the bananas to ripen so that “gojju” can be prepared and then he would relish it as a dessert !!


Ripe Banana Gojju 21 
 Gojju with phulkas

Ingredients:

Banana (ripened)
1 large
Green chilies (chopped)
1or 2
Water
½ cup
Salt
As per taste
Lime juice
About 11/2 tsps
Seasoning Ingredients:

Ghee (clarified butter)
1 tsp
Mustard seeds
½ tsp
Curry leaves
1 sprig


Method:

  1. In a bowl, place chopped green chilies and salt and roughly crush them.
  2. Peel the banana. Cut them directly into the bowl containing the mixture of green chillies and salt.
  3. Then with the help of potato masher, mash the banana well into the mixture.
  4. Immediately add the lime juice. Next add salt and water and mix well and keep aside.
  5. Now prepare the seasoning: In a small pan, heat the ghee on a low flame and add to it the mustard seeds. When the mustard seeds start spluttering, add the curry leaves. Switch off the gas and immediately pour the entire contents onto the prepared banana mixture.
  6. Mix well and serve.
      

    Preparation time                          : 10 mins
    Cooking (for seasoning) time      : 3 mins
    Serves                                          : 2


    Note:
    • The addition of lime juice prevents the banana mash from discoloration and at the same time gives it a nice lemony flavour.
    • For seasoning, you can use oil but Ghee is recommended as it gives a nice aroma to the dish.
    • You can also use a blender to mash the bananas. Add lime juice while blending it.
    • For those with a sweet tooth, can add sugar for that extra sweetness as per their taste. I would recommend jaggery (palm sugar) instead.

    Thursday, March 22, 2012

    Beetroot Halwa

     
    “Yugadi” or "Ugadi" is round the corner. So, here’s wishing you all – readers/viewers, friends and family members, A Very Happy and Prosperous “Yugadi”.

    This is my first attempt at making beetroot halwa and that too not by choice but by chance !
    Actually, I wanted to make carrot halwa but soon found out that I did not have enough of them. Instead I had beetroots. So that’s how I landed up making Beetroot Halwa using the same method and ingredients that I normally use for making Carrot Halwa. But the end result was fantastic!

    It tastes good either hot or cold.

     Beetroot Halwa 13
    Beetroot Halwa garnished with Almond pieces

    Beetroot Halwa 4
    Beetroot Halwa served with vanilla ice-cream

    If serving cold, form the halwa into any shape you desire and serve it with ice-cream. I used vanilla ice cream. Try it out and see for yourself.


    Ingredients:

    Beetroots
    250 gms
    Milk
    1 cup (125ml)
    Sugar
    ¾ cup
    Ghee
    2 tbsps
    Almonds
    7-8
    Cardamom powder
    ½ tsp


    Method:

    1. Wash, skin and grate the beetroots and keep aside.
    2. Soak the almonds in hot water for about 10-15 mins. Then, peel off the skin and cut the almonds lengthwise and keep aside.
    3. In a non-stick kadai/wok, add milk, grated beetroot and almonds pieces (keep a few for garnishing) and boil it on medium flame till the beetroots are cooked.
    4. Then add sugar and on a medium flame, stir continuously till the mixture becomes semi-solid.
    5. Next add ghee and stir as before till the halwa leaves the sides of the vessel.
    6. Add cardamom powder, mix well and remove from flame.
    7. Garnish with almond pieces.
    8. Serve hot or cold.

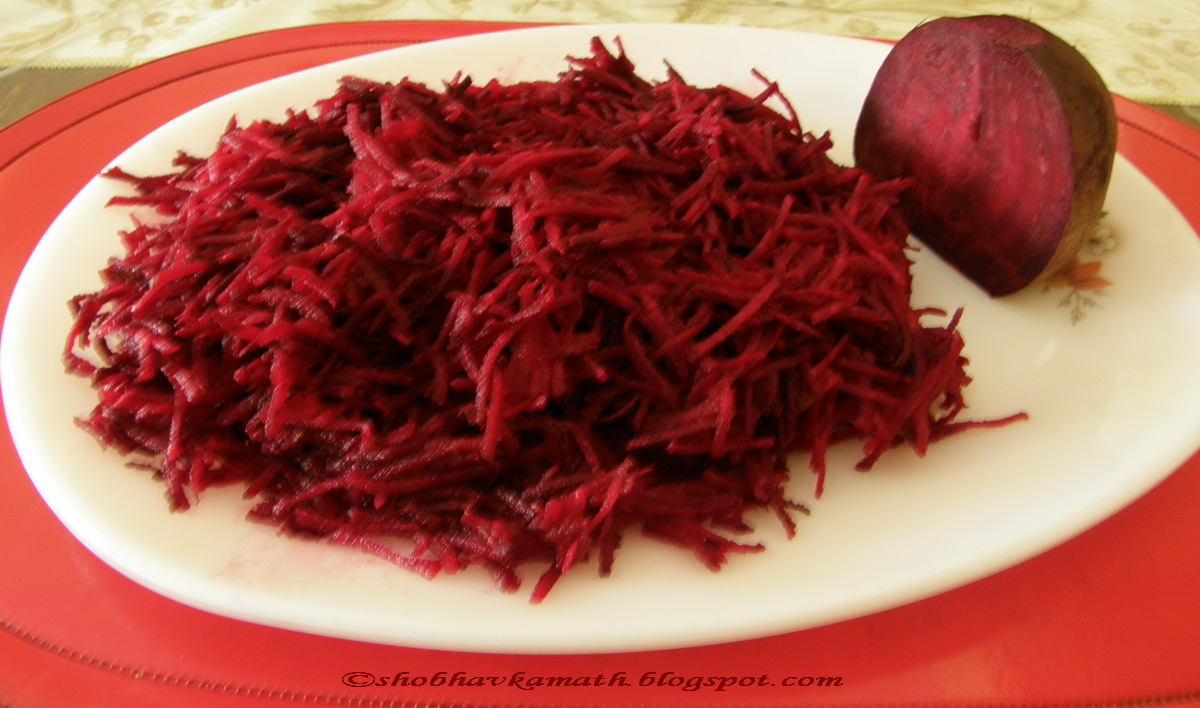
      Beetroot - grated
      Halwa - almost ready


      Preparation time : 15 mins
      Cooking time       : 30 mins
      Serves: 3


      Note:
      • For garnishing, you may use any dry-fruits (cashews, pistachios or raisins) of your choice.
      • Halwa will last for more days when stored in an air-tight container and refrigerated. 

      Tuesday, November 1, 2011

      Kiwi, Melon & Ginger Salad


      Well, we all had our fill of sweets, lights, meeting family and friends and last but not the least the noise too (of firecrackers) this Diwali!  Now, it’s back to routine and I am sure most of you are trying to lose the excess calories gained by gulping those yummy sweets and savouries.

      You can however, indulge in this refreshing dessert without having to worry about any weight gain! 


      Kiwi, Melon & Ginger Salad


      Ingredients:

      Musk melon
      1 (halved & seeded)
      Kiwi Fruit
      2 (peeled & sliced)
      Ginger (tender) grated
      ½ inch piece
      Ginger (extract juice)
      ½ inch piece
      Apple juice
      3-4 tbsps


      Method:

      Melon - cut into cubes
        Kiwi - cut into slices
      1. You can either cut the melon (after removing the skin) into cubes or you can scoop the flesh from the melon with a melon ball scoop and place them in a bowl.
      2. In the same bowl, add the peeled and sliced kiwis and the grated ginger.
      3. In another small bowl, mix the ginger extract/juice with the apple juice and pour this over the cut fruits (melon & kiwi).
      4. Serve in individual serving bowls.

      Serves: 4


      Note:

      • For the apple juice, I used Tropicana apple juice.
      • This is a very colourful and refreshing dessert.

      Wednesday, July 20, 2011

      Muskmelon "hershalen" (dessert)

      Musk melon is also known as cantaloupe. The Indian name for this fleshy fruit is
       “kharbuz”. In konkani language, this is known as “Chibbad”. However, I have found 
      that the  ‘chibbad ‘ variety that is specially available in Karnataka is slightly
      different in shape from the  kharbuz that is available elsewhere in India. 'Chibbad" is
      elongated while the kharbuz is round in shape. Taste wise too I believe there is a
      subtle difference (with my tongue I could not find much) ! People who have been
      brought up on chibbad, since childhood probably would find the difference !

      My mom used to prepare “hershalen” with this fruit. She used to prepare it by cutting the
      melon into tiny cubes/ thin strips. Milk and sugar was then added to the melon pieces
      sprinkled with cardamom powder and served chilled. It tasted very refreshing especially 
      during the summer.

      I have made this "harsahalen" with a slight twist. I have used the melon ball cutter 
      instead of cutting them into cubes and made a milkshake with  the remaining melon.

      In my earlier post, with  watermelon too, I have made use of this melon ball cutter
      to make it more appealing !

       Musk Melon Harshalen (sweet dish)
       Muskmelon hershalen with a twist
       
      Ingredients:

      Musk Melon /Kharbuz
      1 small
      Milk
      11/2 – 2 cups
      Sugar (powdered)
      2-3 tbsps
      Cardamom powder
      1 tsp


      Method:

      1. Wash the melon and cut it into half. Scoop out the pulp.
      2. With the help of melon ball cutter, scoop out as many balls as you can and place them in a bowl.
      3. Then peel off the outer skin of the melon and cut the remaining melon into chunks and place it in the blender. Now add milk and sugar and run the blender for 2 mins or until all the melon pieces have blended well into a smooth milk shake.
      4. It is now ready to be served.

      Serves: 4

       Musk Melon 2
      Muskmelon cut into half

        Musk Melon balls
      Muskmelon ball scoops

      Serving suggestion:

      Place few melon balls in each of the 4 bowls. Pour the blended mixture over these balls.
      and sprinkle cardamom powder on top and serve.

      Note:
      • This dessert tastes better when chilled.
      • If the musk melon is sweet, you may omit the sugar or add them as per your taste.

      Saturday, July 9, 2011

      Mergole - Sweet Potato Paaysu


      “Mergole” is the Konkani name for this sweet dish made from the tuber Kananga (Konkani), Ratallu (Marathi) or Sweet Potato (English). This is typically a Manglorean or coastal Karnataka dish.  I wanted to make this simple long forgotten paayasu and hence I had kept a small piece aside (after preparing the “Kananga Daaddau”), so that I can share this simple and tasty and easy to prepare dish.

      I have used here the coconut milk pack (less work for the lazy me!) instead of the usual coconut gratings wherein you need to grind it with a little water and then strain the juice to make coconut milk. I do admit though that the fresh coconut milk does make a difference to the taste of the dish especially if one is of the “Jibbe Ruchi”  type of person (generally all Amchis are !).


      Sweet Potato Paaysu


      Ingredients

      Sweet Potato (small)
      1
      Coconut milk
      150 ml (11/2 cup)
      Jaggery (molasses) powder
      3 tbsps  or as per taste
      Salt
      A pinch
      Cardamom powder
      1 tsp
      Cashews (halved & roasted in ghee)-optional
      6 (whole)
      Raisins (roasted in ghee) - optional
      8-10


      Method:


      1. Wash and skin the sweet potato. Cut it onto small cubes.
      2. Steam the cubed bits in a steamer or boil them in a little water till soft. This should take about 20 mins.
      3. Add salt, jaggery powder and the coconut milk to the boiled sweet potato bits and bring it to a boil.
      4. Finally add the roasted cashews, raisins and cardamom powder. Mix well and remove from flame.
      5. Serve hot.

      Serves: 2


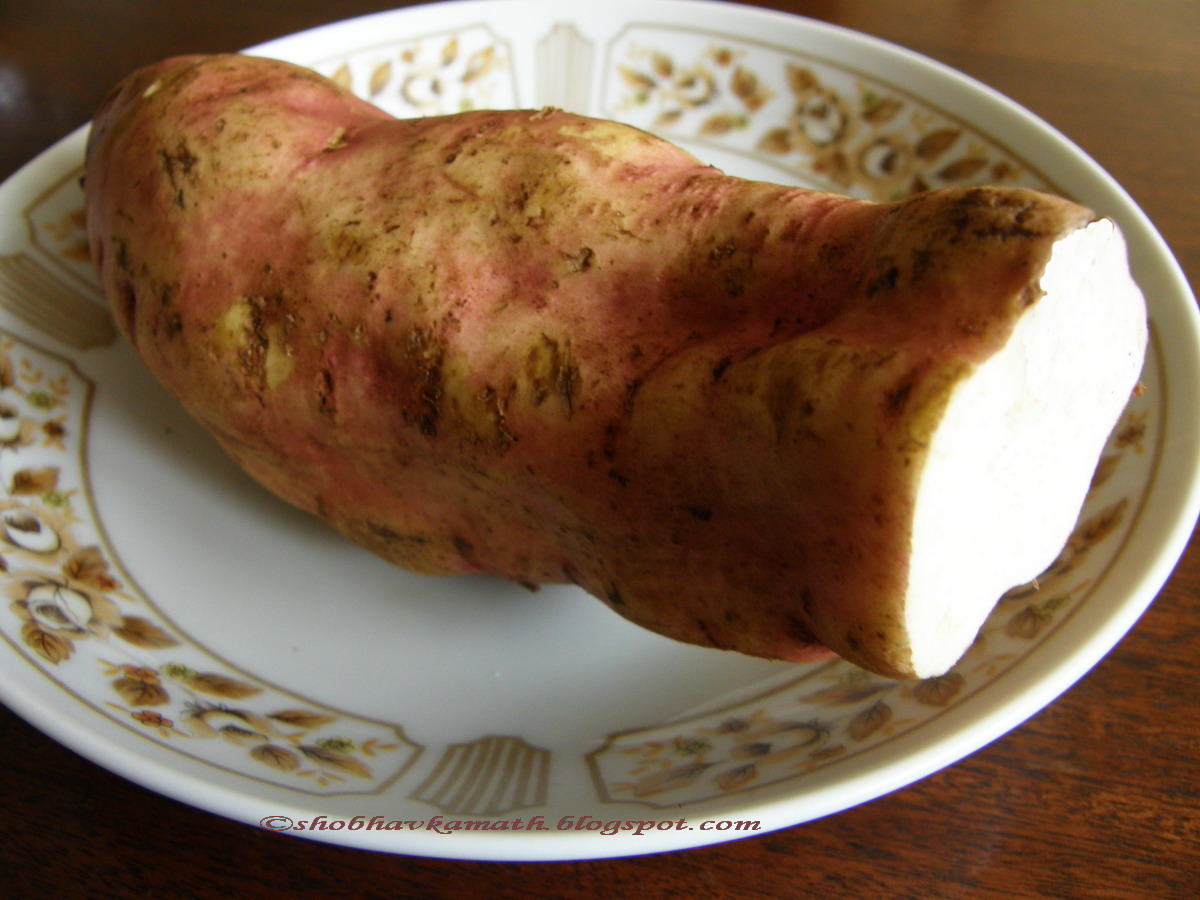
      Sweet Potato - Raw
      Sweet Potato - cut into cubes


               Note:

      • This dish can be served hot or cold. The choice is yours.
      • Traditionally the sweet potato is cut into cubes (you may grate it if you wish) and the skin is not removed. Here, I removed it as the skin had lot of blemishes.
      • It is advisable to dissolve the powdered jaggery in water and strain it so as to remove any insoluble impurities.

      Wednesday, February 23, 2011

      Hayagreeva

      Hello folks! Its been nearly three weeks since I have last posted a recipe. Anyway, I have come back rejuvenated from our trip to our village in Katapadi, Udupi district.

      While there, I enjoyed the “Teru” (Ratha Utsav) festival again. But this time I also learnt this new sweet dish “Hayagreeva” which is very easy to prepare and thought of sharing this simple recipe with you all. However, I made a slight change from the original recipe. In the original recipe, only Channa Dal is used. Instead, I used half channa dal and half Bansi Rawa. I also used organic jaggery (molasses) which is blackish in colour instead of the ordinary golden yellow one. Though the ordinary jaggery gives a better appearance but as you all know appearances are deceptive !

      Hence. appearance wise, it may not look very attractive but, taste wise, I can assure you, it is really delicious. My family members will vouch for it. In fact they all had second helpings!!  In short - " Taste bhi Health bhi !"
      Incidentally this photo was taken by my son-in-law.


      Hayagreeva 2 new


      Ingredients:

      Chana Dal (Bengal gram dal)
      ½ cup
      Bansi rawa ( Coarse Semolina)
      ½ cup
      Crushed organic jaggery (molasses)
      1 cup
      Coconut gratings
      1 cup
      Milk
      1 cup
      Cardamom powder
      ¾ tsp
      Ghee (clarified butter)
      3-4 tsps
      Cashew nuts (halved and roasted)
      About ¼ cup
      Raisins (roasted )
      About ¼ cup


      Method:

      1. Wash and cook Channa dal (bengal gram dal) in sufficient water till soft.
      2. Add Bansi rawa (semolina) to it and if necessary add a little more water and cook till soft.
      3. Mix crushed jaggery to it and let the it boil on a low flame.
      4. Then add milk and coconut gratings. Stir well and see that it does not stick at the bottom. Add ghee and cardamom powder. Mix well and remove from flame.
      5. Garnish with roasted cashew nuts and raisins.
      6. Serve hot or cold.

      Note:

      • This sweet dish can be served hot or chilled. The choice is yours.
      • When served hot, a teaspon of ghee on top will enhance its taste.
      • Cashew nuts and raisins when roasted in a little ghee will taste better.

      Monday, August 2, 2010

      Gharayi (Jackfruit Payasam)

      In my last post, I had written about Jackfruit and had promised you all some sweet dishes using this fruit as the major ingredient. The first such dish is "Gharayi" which is commonly used as a dessert.


      “Gharayi” (payasam /sweet dish) is derived from the konkani word "Gharaw" i.e. jackfruit plums. This is a very tasty sweet dish and is prepared during weddings or any religious festivals or during the jackfruit season!!


      Generally coconut milk required for this recipe, is prepared by grinding the freshly grated coconut with water and squeezing out the juice. Ofcourse it gives a better flavour when prepared this way. But as you know, I always take the easier way out i.e. buying the coconut milk in tetra pack – it saves a lot of time.


      Jackfruit Payasam 2


      Ingredients:


      Jackfruit plums

      8

      Coconut milk

      1 cup or 150 ml

      Ghee (clarified butter)

      1 tsp

      Semolina (fine sooji)

      ¼ cup

      Jaggery (powdered)

      2-3 tbsps

      Raisins

      8-10

      Cardamom powder

      1 tsp

      Water

      3- 4 cups


      Method:


      1. Chop Jackfruit plums into cubes and set aside.
      2. Roast Semolina (fine sooji) with ghee for about 5-7 minutes and set aside.
      3. Boil water and add to it the chopped jackfruit plums. Cook on medium flame till they are soft.
      4. Add roasted semolina. When semolina is cooked, add powdered jaggery.
      5. When jaggery (molasses) is dissolved, add coconut milk and bring it to boil.
      6. Add raisins and cardamom powder. Stir well and remove from flame.
      7. Serve hot.


      Serves : 4


      Note:


      • Jackfruit plums cook quickly so do not over cook it.
      • It is always advisable to soak raisins in cold water first for 10-15 mins and then squeeze out the water completely before adding to the payasam.
      • If the payasam consistency is thick, add more water.


      Monday, April 5, 2010

      Kulfi - Indian Dessert


      Kulfi is a rich Indian dessert somewhat like ice-cream. It is very refreshing to have this during the summers.

      This dessert is generally liked by all young and old alike. Traditionally this dessert is made by boiling milk and reducing the contents to one third and then adding sugar.


      Now-a-days nobody has the time nor the patience to go through the lengthy process of preparation. For lazy people (like myself) short-cut method is more preferable. But mind you the taste has not been compromised !


      I have used condensed sweetened milk thereby eliminating the need for boiling and adding sugar and thus saving time.Weight watchers should however avoid ( though difficult due to its wonderful taste!) this dessert as it is high in calories. I had made this dessert for a special occasion.


      Kulfi 8
      Kulfi


      Kulfi 1
      Kulfi being taken out from the Kulfi-mould


      Ingredients


      Sweetened Condensed Milk

      1 cup

      Whipped Cream/ Milk cream

      1 cup

      Cashews

      8 -10

      Milk

      ½ cup

      Mixed chopped nuts

      20 gms

      White bread slices ( crust to be removed)

      4 slices

      Cardamom (powdered)

      ½ tsp

      Saffron

      A pinch


      Method :


      1. Grind the cashews. Add 1-2 tsps of milk and grind it further to a thick paste. Keep aside.
      2. Place the slices of bread in a bowl. Warm the remaining milk and pour it over the bread slices. The slices will turn soggy in a few minutes.
      3. Put sweetened condensed milk, whipped cream/milk cream, ground cashew paste, soaked bread slices, saffron, powdered cardamom and the chopped mixed nuts in the food processor /mixer (use the whisking blade) and blend well to a thick paste. Take care to see that no lumps are formed.
      4. Fill this mixture in the Kulfi moulds (or in any container) and cover it with lid and freeze in the refrigerator for about 2 hours.
      5. Before serving, remove the kulfi from the freezer and keep it at room temperature for about 10 mins. It will now be easier to slide the kulfi from the mould.
      6. Serve immediately as it will melt quickly.


      Preparation time : 15 - 20 mins

      Freezing time : 2 hours

      Serves : 6


      Note:


      • If the Kulfi mould is smeared with a thin film of oil, before the mixture is poured into the mould, the kulfis will slide out more easily.
      • I use Nestle's whipped cream generally. But this time since it was not available in the super market, I used Amul milk cream instead. The result is almost the same.
      • Grinding cashews and adding to the mixture enhances the taste of Kulfi. This can be omitted and instead the cashew bits can be added along with the chopped nuts.


      For more information:

      http://en.wikipedia.org/wiki/Kulfi